Smoking (hot) revolver
This week I made a plan!
...
...
And a revolver. But mostly the plan. I've started preparing for the June class that's going to revolve around hard-surface modelling. (Got it? Revolve... OK, I'll show myself out.)
I went through the class syllabus and noted down the course pre-requisites and homework I'll need to hand in. Some of it I've done already, other projects will make ideal fillers until the class begins. First of those is a revolver (featured in the Mesh Modelling Bootcamp).
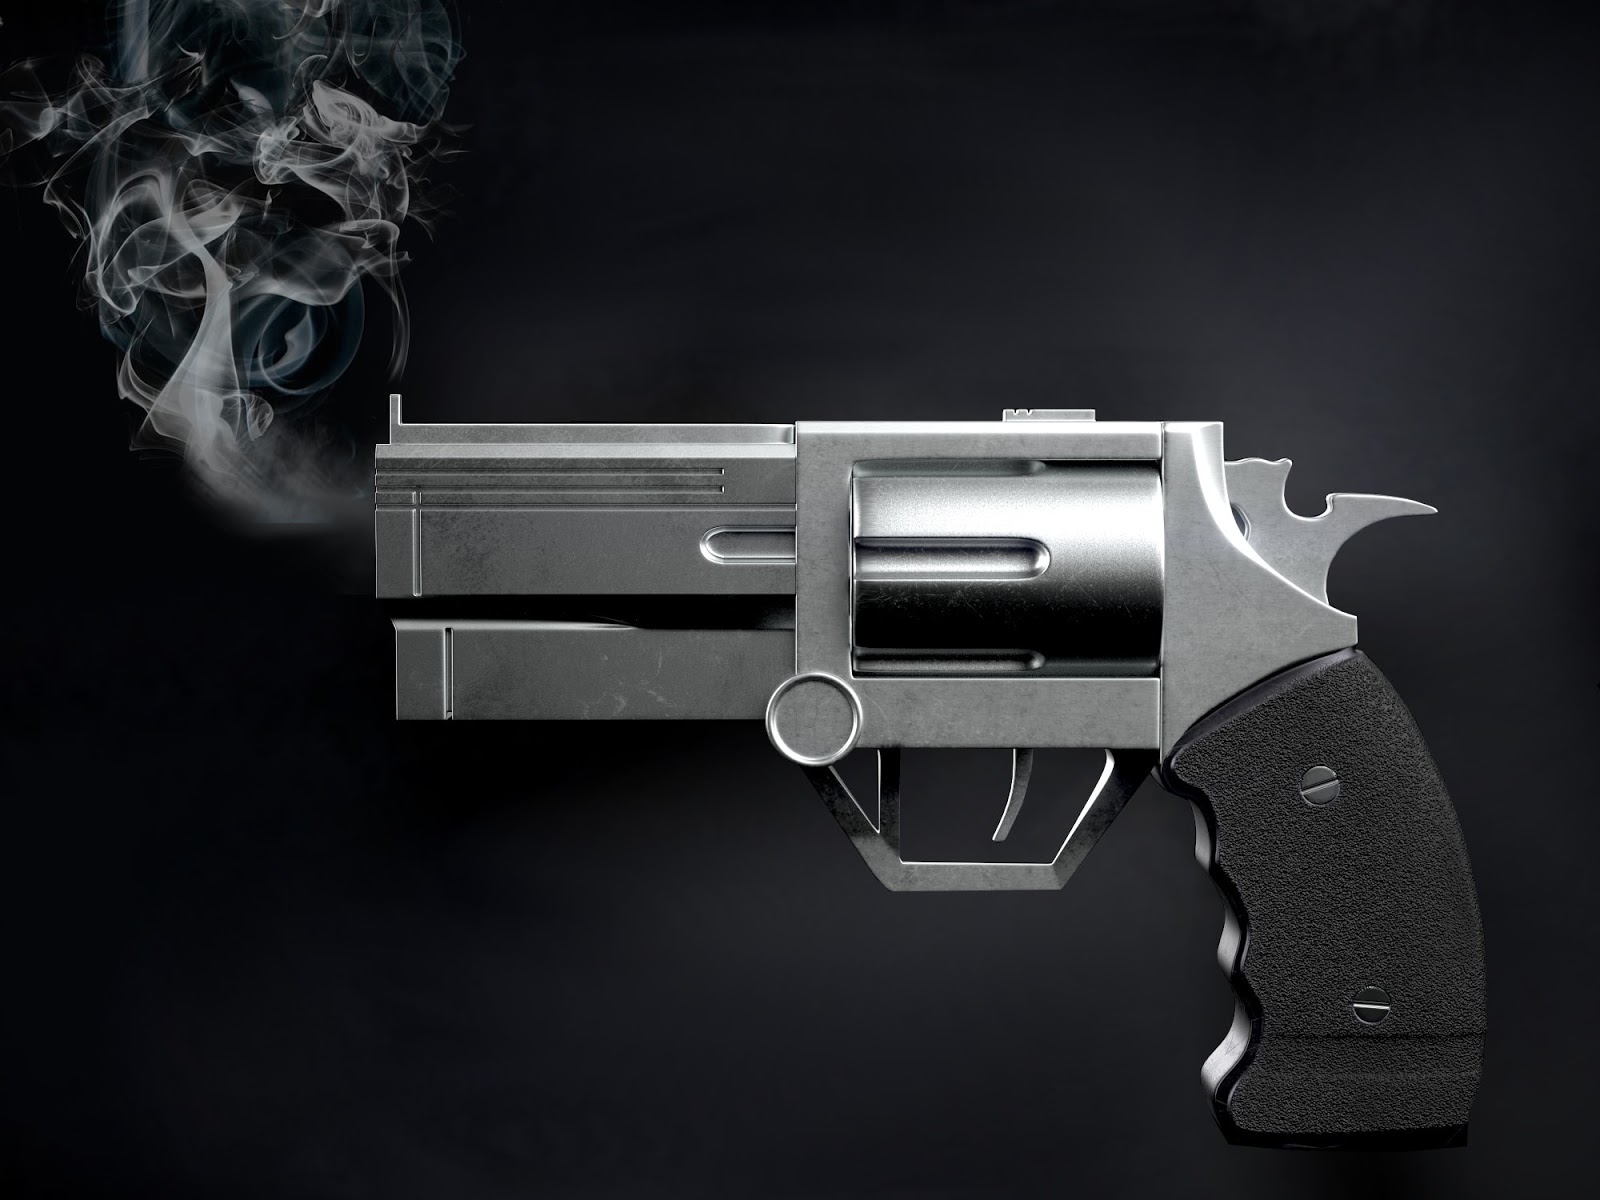
Now, I'm not going to talk about the modelling part, because that is fully covered in the CG Cookie course. I did make a few adjustments (most notably in the number of chambers—6 instead of 8) but they are not large enough to warrant several paragraphs of text. As it is with projects like these, I like to focus instead on the creative input I actually delivered myself. Which in this case is texturing, lighting and compositing.
Texturing was a lot easier than I anticipated. I thought I would have to go into Designer and create a couple of materials, but, in the end, everything I needed I found in the default shelf of the Painter. The metallic bits of the gun are made up of several slightly different iron materials and the handle uses hard plastic with a grainy plastic on top. All of this is peppered with scratches and fingerprint smudges—and the overall effect is probably too strong still. I tried to dial it down to about half of the strength but I was struggling with my desire to show off the imperfections.
As for the lighting setup, that one was a pain. Not because I couldn't find anything good, but because I found too many that looked nice. And I had a really hard time choosing the best one. In the end I decided to save all of those renders (with parameters in description so that I could re-create them if needed), which means that I can now present them to you. A word of warning though: these are early renders, so they are grainy and the imperfections are not toned down yet.

Isn't it amazing, how a single model can look so different if you change the environment? The downside of that is, of course, that you can spend hours tweaking everything to your liking—and even then you can never be sure that you chose the best one.
And the same applies to compositing. If you've read any of my previous posts, you might remember that I have a... complicated relationship with GIMP. (I've been thinking about dumping him in favour of Krita, but shhh! Don't tell him!) Even so, I realised early on that I wanted to present this as a smoking gun. And since there is no way I could do that in Iray, I had to humbly go where I didn't ever want to go again, and knock on Mr. GIMP's door. Now, he was a real gentleman this time around and it only took me a couple of hours to get to the final image. And I think I even started to understand how the bloody thing works!
The composite is made up of four layers—which is three more than I normally use. One for the revolver (which I needed to carefully cut out), two for the wisps of smoke, and one for the background. As you can see in the lighting setup reel, I intended to go with full-black background initially, but at the last minute I changed it to a more painterly version. I think I've been watching too much of Marco Bucci's "10 Minutes to Better Painting" lately...
Anyway, that will be all from me this week. So... wait, I haven't told you about the plan, have I? Well, next week I'm going to do an architectural visualisation (at least I hope I'll be able to make all of it), and then it is a motorcycle, followed by a post-apocalyptic vehicle. All of that in preparation for the car I'll be modelling during the class. Yeah, I know. A car. Out of all the things I never wanted to make, cars are my top favourite. But, here I am, preparing to tear that resolution apart. So, wish me luck—it should be an interesting month and a half.


Comments
Post a Comment