Art in the attic
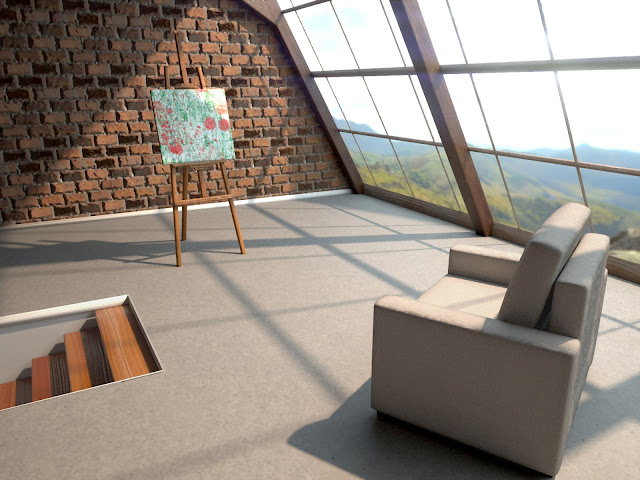
So... the "architectural visualisation" turned out to be a private one-piece art gallery that looks like a potato. Pretty underwhelming, isn't it? Did I have more grandiose plans for it? Of course I did. Picture an atelier with a dirty rag on the floor, paint drips everywhere... and then forget about them because they won't be joining the party. Well. Maybe next time?
Anyway. I went through two CG Cookie courses this week. One of them was, obviously, focused on creating an interior image (a lot more detailed than this one), the other one explained some of the intricacies of Blender-Substance workflow. I didn't know there was such a course before I stumbled upon it by accident. But I'm happy to say that I picked up a few new tricks.
First of them is the Texture Atlas. It's an add-on that I've heard about before but never actually got to use it. Until now. It becomes very handy if you have several objects that you want to keep separate but you also want to have them in the same UV space. And why would you want that? Well, Substance creates one texture set (read: multiple texture maps) per material. If you have a busy scene, you are bound to sink under the weight of individual texture maps pretty soon.
Enter: texture atlas. When you use it, it creates a temporary proxy object that helps you assign selected mesh objects to a unique place within the allocated UV space. And since Substance now has a UV island selection mode, assigning materials is super easy. Unless you screw up somewhere along the way and have to re-import the fbx file with a new texture atlas. (Nope, definitely didn't happen to me. Nuh-uh).
 |
| First version in Blender. Very dark, given there are no windows. |
Another helpful trick I picked up from the course is ID map baking (funny how there was a point in time when I had no way of doing that and now there are... five different options?). The way it is done here is by cunning use of material override and some script magic. I haven't checked the resource section to see whether the script is included, but it was quite short, so it should be possible to re-type it if needed. The material override comes from a cube that has an emit material assigned. Emission is important here, because it makes your UV islands shadeless (solid colour). The colour selection is then driven by the script. And all together it makes a delicious ID map. (But I think I'll stick to the UV island selection for now.)
 |
| Second Blender version. I loved the view outside, but the bricks looked awful. |
So what else was I doing this week? Hmm, let me see... Oh yes, I started creating my own asset library. Each asset has a Blender scene, SP scene, exported textures and a Cycles render. I have a grand total of 2 assets at the moment, but stay with me, it will get better. And why am I doing this? Because I was quite excited to find out that Blender 2.8 will have collections. We'll be able to instantiate assets (fairly easily it seems) which is something I've been waiting for... forever. Yes, I'm a sucker for a proper scene organisation.
What else... I made a couple of small discoveries and workflow adjustments, generally related to emergency problem-solving.
- I imported SP textures to Blender, tried to render a nice image, and failed. Found out I could render the whole thing in Iray by assigning already exported textures manually.
- I tried to render a nice image in Iray, and failed. Fireflies heavy metal party. Got rid of them by using GIMP's despeckle filter.
- The nearly-final render had areas that weren't bright enough. I learned to selectively brighten parts of images in GIMP.
- I put together a short gif documenting the final render progression. But it wasn't clear what happened where. Discovered that adding text to gif is just a few clicks away.
Do you want to see the gif? Here you go:
And that's all for today, folks. If I remember correctly, it is a post-apocalyptic vehicle week next time.
Oh dear.


Comments
Post a Comment