Pokemon 07: Magikarp
After the last week's struggles I decided to cheer myself up a bit by creating one of the sillier Pokemon. It was a close race between Psyduck and Magikarp but eventually the latter prevailed. Mainly because I have something special in mind for him. But let's not get ahead of ourselves, shall we?
The base mesh should be one of the easier ones. After all, Magikarp is basically an inflated balloon with fins. I'm tempted to start sculpting from a primitive object again but I have to keep reminding myself of what happened last time. OK. No primitives. Skin modifier, here we come again.
***
 |
| Basic mesh |
Alright, that didn't take too long. The fins made a half-hearted attempt to break the mesh at one point but they were put in their place and they no longer object to being the floppy bits. After I applied the Skin modifier and effectively created the mesh, I also applied SubSurf modifier to make the sculpting somewhat easier. I finally realized that if I spend a bit more time on the base mesh, it will likely result in a better sculpture and fewer bad words.
Since I have nothing extraordinary to report at this stage, I'll get back to you once I'm finished with the sculpture.
***
 |
| Finished sculpture |
And I'm back. With a sculpture. Which for once didn't try to ruin my sleep for days on end. There are a few areas I treated with special care because they proved to be problematic in the past. One such area is the eye socket. I made sure that its edge was nice and sharp. If I hadn't I'd have had to struggle with the retopology and normal map again. I also made the details stand out a bit more because I know that I'll lose some of the flavour in later phases.
The area that was the most difficult to do was the mouth, and especially the lips. I went from "too thin and flat" to "way too puffy" over and over again. I just don't seem to be able to refine rounded shapes. Every time I use a smooth brush it takes away way too much geometry. I tried lowering the strength to almost nothing, I have increased the size of the brush and the detail, but it stubbornly keeps doing its thing. Lumpy lips it is, then. Exactly what I wanted to do all along. Erm.
***
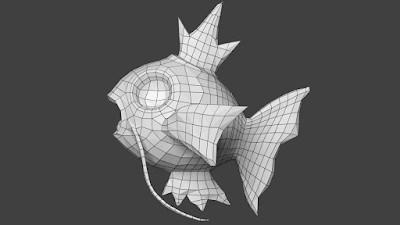 |
| Retopologized mesh |
I didn't rush the retopology as much as I did with Eevee, and it shows. It is still far from perfect, though—some of the loops get intertwined in a way they definitely shouldn't but since I only need to make a mesh that is good enough, I'll leave it at that. I used my old trick with the Wire modifier so that I can show the retopology in the gif a bit better. I try to be consistent with the order of images: finished sculpture, then optimized mesh, and finally optimized mesh with details regained through the normal map. Speaking of which... let's create one.
***
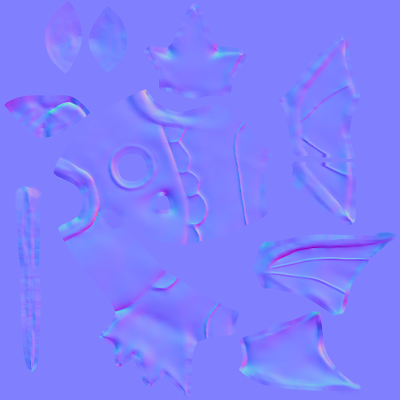
What the hell has just happened? I've done this bit, what... three times, now? And it has never done this before! *Sigh* Blender can be sometimes... a pain in the bottom. I did what I normally do. I took the optimized mesh, duplicated it, scaled it up alongside the normals, used that as a cage for baking... and the normal map it spat out looked like it ignored the SubSurf modifier. It was all blocky and face-y. I must have spent good two hours trying to fix it. And I've tried every single trick I know.
I applied rotation and scale to all meshes. I recalculated the normals. I applied the mirror and Sub-Surf modifiers on both meshes and I smooth-shaded the hell out of them. Nothing worked. In the final, desperate attempt I went back to an earlier save (with none of these changes applied) and I baked the map directly from selected to active. And it came out OK. Well, not completely OK, because this approach creates artifacts that need to be fixed manually, but at least it was no longer ignoring the smooth surface. I guess I'll never know what was causing it—unless a kind stranger happens to be passing through these lands and posts a helpful comment in the section below. (Yeah, I'll never find out, will I?)
***
 |
| Finished texture |
Luckily, the texture painting went a lot smoother. My only concern was the contouring. If you remember, it didn't go very well with Golbat. I'd like to think that I did a better job this time. The lines are not as nearly as thick and wobbly as I used to make them—even though they still look hand drawn. Which is not necessarily a bad thing. I mean, they are very sharp and defined in the 2D art but wouldn't it look weird in 3D if they were perfect lines? I could have done that (I now know a tool that would have helped me do it faster than by hand) but I did decide against it. Maybe it was a bad call, who knows.
***
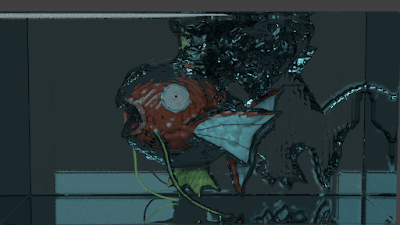
Heh. With every project I work on, I try to do something new. And quite often I end up amusing myself more than anything. This week I decided to try fluid simulation. After all, Magicarp is a water creature and it makes sense to put him into a body of water. I dug up an old tutorial from the tutor4u channel, which helped me immensely when I was first learning Blender. The tutorial is easy to follow so I'm quite confident that I set up the simulation correctly. Only in my case it led to some hilarious results.
I tried several simple animations to get the water moving. The first version was the most complex. Magikarp swam towards the camera, magnificently sliding between the waves. In my mind. In reality, it splashed around jerkily, creating a minor tsunami in the process and enveloping itself in a weird water bubble. So I scaled it down a bit. I made it splash into the sea. It has always looked kinda surprised to me, so I thought it would suit the scene. It didn't.
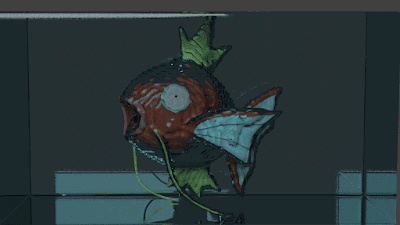
Since I wasn't able to get rid of the bubble layer around its body, I scrapped the fluid simulation and put him into still water. Hopefully, my well-practiced trick with fractal displacement will be enough to create the illusion.
Since I wasn't able to get rid of the bubble layer around its body, I scrapped the fluid simulation and put him into still water. Hopefully, my well-practiced trick with fractal displacement will be enough to create the illusion.
***
In the end, I spent quite some time tweaking the scene. I had to add background image to make the water more believable. I first thought that I'd colour the glass material itself but it's recommended to keep it pure white because of the reflections. Then I needed to fill the scene up a bit, so I created a few stones and scattered them around with a particle system. Got a nice result on my first try. Unexpected but certainly very welcome. I thought I would reuse the one plant I always reuse but then I told myself not to be lazy and I created a new one.
And then, when I was at it, I also sank my teeth into a bit of post-processing. Nothing major, I still don't have a clue what I'm doing in the compositor, but I managed to tweak the RGB curves (which, eh, increased the contrast?) and added a vignette. I know, everyone does that, but it looks better and it guides your eyes to the interesting bits.
And then, when I was at it, I also sank my teeth into a bit of post-processing. Nothing major, I still don't have a clue what I'm doing in the compositor, but I managed to tweak the RGB curves (which, eh, increased the contrast?) and added a vignette. I know, everyone does that, but it looks better and it guides your eyes to the interesting bits.
So that's all for this week. I know that in the introduction I mentioned something special, but... this is not it. Mid-week I decided to change my approach to learning Blender. Couple of months ago I bought a CG Cookie membership which gives me access to a ton of trainings. Which I haven't had much time to work on. And that's a shame. Plus, I feel like I'm doing the same thing over and over again, and I'm not learning new stuff as fast as I'd like to.
So, I want to work through various courses on CG Cookie and complete the associated exercises. But at the same time I want to keep on doing a project each week. And I think I can do that by evolving the exercises well beyond the basic requirements. For example, if I create a model of a wheel, I can texture it and build a full scene around it. Or if I do an animation (which is the holy grail I ultimately want to get to), I can easily adjust it and make it my own. To be honest, I'm really looking forward to this. There are so many intriguing exercises to choose from that I shouldn't run out any time soon. And if it doesn't suit me I can always go back to Pokemon. Because THAT would run out... never, I think.
P. S. I found a way of fixing issues in my models on Sketchfab, so feel free to check them out.




Comments
Post a Comment