Pokemon 05: Jigglypuff
This week I decided to sculpt Jigglypuff because I thought of something special I could do with the scene. If you are a noobie artist like me and you ask for advice, people will often tell you that your artwork must tell a story. So that's exactly what I'm going to do this week because Jigglypuff is an ideal material for that kind of thing.

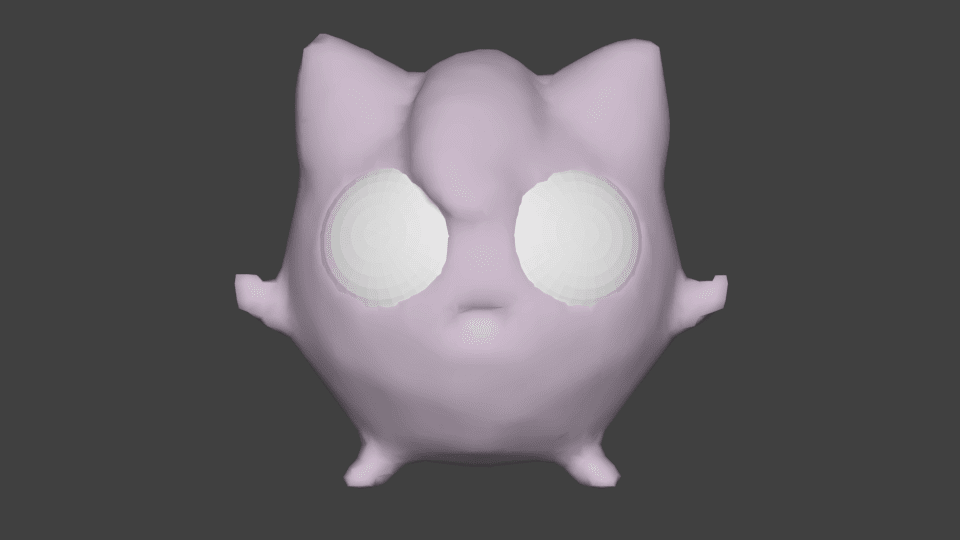
I'm also going to start the sculpture differently. Normally, I would tussle with the skin modifier until I could shape it into something usable but Jigglypuff has a nice advantage of being round. That means I should get away with using a sphere as the starting mesh.
***
Now, that worked better than I had expected. Let's hope my luck holds until I'm finished with the scene. I used the snake hook brush to extrude the ears, arms and legs. Then I smoothed out and corrected the general shape so I should be ready for sculpting the details.

I think I can reveal at this point that I'm intending to create not one but three Jigglypuffs! A-haa, you weren't expecting that, were you? But in order to do that I'll have to be clever about how I create my meshes and textures so that I can reuse as many things as possible. Ideally, I would only need to sculpt and retopologize once, and then adjust the meshes for the purpose of creating normal maps. I'm pretty sure I'll be able to do that for Stage 1 and 2 but I might need to make sculpting adjustments for Stage 3. (I've just realized that calling it "stages" probably sounds more ominous than it needs to but I'm going to use it anyway.)
***
Work on the sculpture is progressing quite well. I've created eye sockets because I want the eyes to be a separate, mirrored object. That should help me a great deal when I'm texturing them.The most difficult part so far has been Jigglypuff's hair. I just don't seem to be able to do round and curly bits when it comes to sculpting. Also, its hair is a major nuisance because it breaks symmetry of the body. During sculpting it is not a big deal, I can turn the symmetry on and off as I like, but it will become unpleasant during retopology.

***
There wasn't much work left on the sculpture. I created the mouth cavity and I tried to make its arms and legs look somewhat better. The legs gave me a bit of fight and they still don't match the 2D images perfectly but I have learned that it is not possible to keep absolute fidelity when it comes to translating from 2D to 3D so I'm not going to fuss about it too much. Next stop: the Retopology centre.

***
Right. Instead of doing the retopology as usual, I spent some time fiddling with modifiers. I recently found out that there is a "dirty" way of retopologizing. You can take the sculpture (which likely has hundreds of thousands of triangles) and apply the decimate modifier. This will give you a mesh that is made of triangular faces. That is not ideal because you'll get a lot of pinching. But you can use the Remesh modifier which will change the triangles into quads.
Now, there are several pitfalls along the way. The biggest one is finding the right balance between Decimate's "Ratio" and Remesh's "Octree depth". If you decimate the sculpture too far, you will have to increase the Remesh level, which multiplies the number of faces (similar to how SubSurf works). You can easily end up with a mesh that will create a poor normal map and at the same time is too dense for UV unwrapping.
|
|

In the end, I decided to do the retopology by hand. It went unprecedentedly well. It is only Tuesday and I have an optimized mesh. Which makes me elated and anxious at the same time. Anyway. Now that I have a decent mesh to unwrap, I'm going to do just that, and then I'll create the normal map.
***
And done. I had a look around and I found a tutorial that explained another way of baking the normal map. I took the optimized mesh and I scaled it up along its normals so I got a puffed up version of it. Then I ticked the "Cage" option in the Bake settings and I used the puffed up mesh as the cage. Afterwards, I baked from the sculpture to the (small) optimized mesh as usual. I'm not entirely sure how it works but it certainly gave me a better result with fewer artifacts.
|
|
|


Fewer but not none. There were two places that looked like scraped metal. Fortunately the tutorial also covers fixing those issues. And it was as easy as using a smear brush on the bad bits. And I refreshed my knowledge of texture painting in the process so that's all good. With the normal map complete, I can now focus on the diffuse texture.
***
Phew, both textures are done. (Both? I hear you ask. Yes, both. The body and the eyes, remember?) Jigglypuff's body is really only made of one colour but I tried to subtly shade some areas so that it is not a solid pink. I darkened the areas around its eyes and ears, the underside of its belly and arms, and a little bit of its cheeks. Next, I'm going to move to Stage 2 and make Jigglypuff sing (OK, *that* sounded ominous).

***
Hmm, I thought that this would be easier. To explain: there are only a couple of adjustments I need to make to create the illusion of it singing. I need to tweak the eyes, the mouth and the arm. I pulled off an especially cunning trick with the eyes. I only changed the texture. No sculpting or anything—they are exactly as they were, only pink with black line at the bottom. The mouth was even easier. I just pulled the bottom edge down with proportional editing on, and the mouth opened up nicely. No need to change the normal map or texture. But the arm!

The plan was solid. I would create a partial rig, position the arm and apply the Armature modifier. Easier said than done. The problem is that old Jiggly is really round and its arm sticks out of its side in the middle. If you try to position it as if he is holding a microphone you are going to get some terrible stretching and squashing. At one point I even tried cutting its arm off and placing it where it needed to be. Then I reconnected it back to its body but the result was pretty abysmal and on top of it broke both textures (new faces naturally weren't part of the UV map). In the end, I had to do the rigging three times and scale the arm a little bit before I got something presentable. But it is Stage 2 complete and now only Stage 3 remains. Onwards!
***
Heh heh. I created a blob monster. I won't post it here but I'll put it into the gif progression as a kind of an Easter egg - go check it if you are interested. Here I'll just say that my original hunch was correct and I needed to sculpt over the Stage 1. I tried to make Jigglypuff as puffed as possible, although it is not as extreme as it was in the series. I was aiming for a general "pissed and angry looking" creature.

For retopology, I duplicated the optimized mesh and with snapping on, I moved all the vertices to the new puffed up position. Not a trivial task but not as bad as having to do a new retopo. However, I had to make a new normal map and adjust the texture. I further darkened the areas around its eyes so that it looks more menacing. And I redrew its mouth into a tiny line. As to the eyes, I added another dark layer and made them smaller, which I think conveys the emotion as I intended. The final stage of the journey is to create a scene that will fit the story I have in mind.
***
And I'm done. I imported a couple of trees from my earlier projects, applied SubSurf modifier to them and used them as a stylized forest. Then I cut one of them down and made it into a stump (a really poor impression of a stump if you ask me but after last week's experience I want to steer clear of any kind of realism). Add a bunch of grass tufts, a background gradient and voilà, a forest scene is born.
I played a lot with different kinds of lighting and camera set ups. I discovered that you can easily have several cameras in your scene and switch between them with Ctrl+0 (on Numpad). I wish I had known this earlier, it would make my Bulbasaur and Charmander projects easier to render. Anyway, when I got the light down as I wanted, I just added a bunch of Z's to the last image (using the Text mesh) and I combined the rendered images in Gimp (which at this stage I find infinitely more confusing than Blender).

And that's all for today, folks! Next time I'm probably going to do Sandshrew but, as always, if you want to point me in a direction of your favourite Pokemon instead, feel free to do so in the comments.

Comments
Post a Comment