Bricks & Metal
This week I decided to focus all my energy on learning Substance Designer (partly because this was the last week I had to try the Substance suite for free and partly because I really wanted to). I found out that a) being able to create procedural materials is strangely intoxicating, and b) it takes bloody forever.
As a result of "b" I only have an unbelievably simple scene to present to you. It is so simple in fact that it almost isn't a scene at all. But it comes in several versions, so... it kinda works? (No, it doesn't, I know. But it was worth a try.)
I'm also going to do this a bit differently and give you a lot more pictures than I usually do. Which means that I'm going to type less. (Yaaay! I hear you say.) So, what exactly was I doing this week?
By a happy accident I found TextureLib.com which offers great textures under a CC license. I don't plan to use the textures directly, but as a go-to place for references and color sampling images it is going to be great. I've already used it to colorise my rust and bricks materials.
Speaking of materials, I created several of them. I mostly followed Allerog- ... Allegro- ... Allegorim- *sigh* Couldn't they have picked an easier name for the company? Well, I followed the Substance tutorials created by the people who made the software. I started with a rusty metal and moved to a more complex brick material.
The main philosophy behind the Substance suite is reusability and easy modifications. I followed suit and created a clean metal substance
with a separate rust material
which I then instanced into a complex material that also adds a bit of dirt
The beauty of this is that I can use any of these as a basis for my future materials or directly in Painter. And with the complex material, I can select metallic colour, and the amount of rust and dirt by setting three simple parameters. If Poliigon gave me nice juicy fishes, Substance is teaching me to fish. And I love it.
Now, before I show you the results of the other tutorial I followed, I need to interrupt this post with some very important news. By a happy accident I found a comment on Blender Stack Exchange which explained to me why I was getting a pitch-black texture every time I tried to combine Normal map with micro-displacement. The solution is so simple it is almost embarrassing. When you set up the micro-displacement on an object (Displacement = True, Experimental features enabled, SubSurf set to Adaptive) just change the "Tangent Space" on the Normal map to "Object Space". Really, just that. To demonstrate the difference, I re-rendered my well:
Day and night, isn't it? And such a small change... Well, I still have a lot to learn.
But before I get all teary-eyed, let's get to the brick material, shall we? Here is my final graph, which doesn't include some of the layering done in the original tutorial:
And that's one of the simpler materials, mind you. I've seen graphs that were five times that size. How anyone can remember what controls what is a mystery to me.
Anyway, this is a spherical representation of what this spaghetti thing produces:
Anyway, this is a spherical representation of what this spaghetti thing produces:
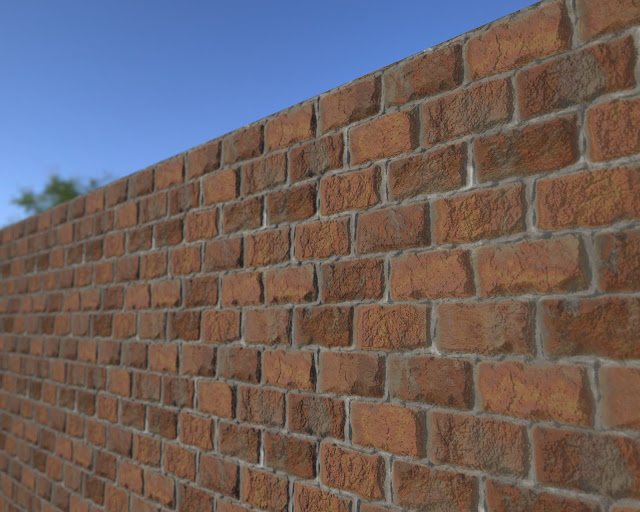
(I promised you a lot of pictures, didn't I?) I use this image as an icon in my custom library, but I'll be the first to admit that it doesn't show the full potential of the material. So why don't we have a look at three different lighting setups and compositions to see what this substance can do?
I'll assume you are fervently nodding your heads, so here goes:
I'll assume you are fervently nodding your heads, so here goes:
Well, you have seen this one, so no surprise here. But you might be interested to know that this was my second attempt at rendering the scene. Had I stopped at the first one, you would've gotten this:
Not bad, but... I like the first one better. I still kept this one, though, because it shows the full extent of my work this week—and the HDR seems to fit nicely.
When I had these two renders I realised that I haven't showcased the metal floor very much—and I immediately started to look for ways to rectify it. It wasn't that easy, though. This is the best I could come up with:
That gets a serious "meh" from me. But the bricks are lighted a bit differently than in the other renders, so I might as well include it.
And this will be all from me today. I really hope there is a decent topic in the Weekly Challenge announced tomorrow, because I'm itching to create something more complex than two textured cubes. I should also refresh my animation skills before I forget everything I've learnt so far. And my sculpting skills. And— *Sigh* There are so many things you need to know if you want to create animated movies. And so little time. I should better run, see you next week!


Comments
Post a Comment