Discworld - the space edition
Ha, you were all expecting Deadline, weren't you? No, no, he was safely shoved into the Maybe-One-Day-When-There-Is-Time-For-That-Nonsence drawer and instead I created the first part of what I hope will become a series: the Low Poly Discworld. Even though, to be fair, I am not entirely sure this still qualifies as low poly. I don't use subsurf modifier but that's about it, really. Is medium poly a thing yet? It is certainly not 'well done'... (I'll show myself out.)
Anyway, I hope I'll be able to make this shorter than the last one. (So prepare yourselves for twice as long, in all likelihood). Ready? Let's roll.
It all started, as it usually does, with modelling. If you look a few weeks back, you'll see that I was able to cut some corners in this project because I boldly reused the mighty protector. Also known as the elephant. But it still left me in position where I had to create the turtle, the Disc and the environment. Not a small feat, especially if you consider that I had no idea how to do the environment bit. But more about that later. Let's first talk about the turtle.
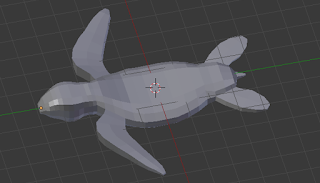
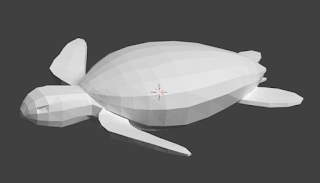
I had a brilliant idea that I'd create it in two separate pieces—the body and the shell—and join them afterwards. If you've read my previous posts you've probably noticed that I reserve "brilliant" for instances where something went horribly wrong. And indeed, this is one of those cases. The problem here was that I made the shell too round. Everybody likes turtles with curves—except for the elephants who have to stand on them. And when I flattened the shell eventually, it created weird artifacts in the neck area. The poor turtle looked like one of its ancestors was a porcupine.
So I dived in to investigate. After pushing the faces around and making a real mess of it, I finally figured out what was wrong. The neck area got squashed, sure, but the main culprit was the extra face at the bottom of the shell that I forgot to remove. Happy with my detecting abilities, I deleted the unwanted face—and provided the turtle with nice air-conditioning because its body happened to be narrower than the shell. With the bottom face removed you could see right into its... everything, really. As that's not a way to treat a turtle, I set out to fix this. Luckily for me, I was able to extrude (or intrude, in this case) the outer rim of the shell just so that it didn't mess up the neck, while still covering the holes in the sides. Phew.
The next step was to place the elephants on the turtle's shell. I recently found out that if you duplicate objects with Alt+D, instead of the regular Shift+D, the objects will share the same data. Which should translate into shorter rendering time. I think it's best used when you copy objects that you don't want to change individually—which was exactly my case. Copying the elephants, however, was the easy part. I thought that positioning them wouldn't take long but they turned out to be especially non-cooperative. At one point, I ended up with an elephant not standing on the shell at all because when it did, it appeared to be in the centre of the shell. That's weird camera angles for you. Also, the elephants are rigged, and the only way I could find to move the body and the skeleton at the same time was to select it in the Outliner. Not the fastest way to tweak things, that one.
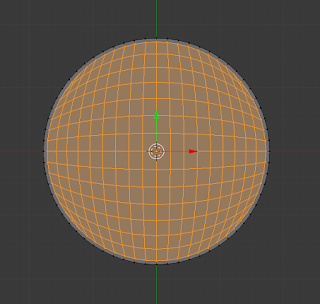
But it was done and I went on to create the Disc. I had a pretty good idea how I wanted to go about it, I just wasn't sure how to get to the point where I would be able to do it. A few Google searches later, I managed to figure it out. The issue was how to divide a circle into quads. I had to give it a few goes before it gave me enough faces to play with but eventually I ended up with this. All hail the "grid fill" option.
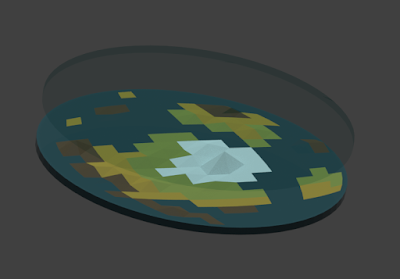
With the circle divided appropriately I started to shape the continents. Which in my case meant selecting faces in the general area and assigning them to one of the land materials. Creating elevation was as easy as pulling at a few vertices. I tried to follow the real topography—Cori Celesti should be placed as correctly as possible in my circumstances. It might be too high but I'm sure the gods wouldn't mind. Then, learning from my previous mistakes, I decided to create the upper transparent layer differently than I did in the tropical island scene. In here, I selected all the upper and side faces, duplicated them, made them into a separate mesh and then gave them the transparent material. The finished mesh looked like this:
The last part of creating the Disc was the water falling over its edge. For a long time I wasn't sure if I wanted to do that at all—and truth be told, I'm not very happy with the final result. The way I did it was by using particles. Lots of them. I created a rough droplet shape and used that as a particle model. The problem with rough shapes is that they are spiky. Which is not exactly the adjective that comes to mind when talking about water. As a result, my waterfalls look like icy hedgehogs. But space is really cold, isn't it? So maybe... and no one said that it couldn't be ice, have they? Sigh. I know, I know. I'll learn to do it better, I promise.
But with that the scene was almost finished, right? Well... There was the question of what to use for background. Free HDRI skies are relatively easy to find. Space? Not so much. Eventually I found an image of Crab Nebula that seemed to suit the scene. But I had a lot of fun trying to position in it properly. I still don't understand how the mapping node works so it was mostly tugging at coordinates, hoping that something nice would happen.
And then there was the sun and the moon vying for attention. Where they
were not challenging in shape, they made up for it in materials. The moon was simpler. I cheated a bit, ignored the dark spots it should have and gave it just the pale material. But picking one for the sun, that was way more interesting. It had to have an emission shader, that much was clear. But how to make it look shiny enough and not divert the attention from the scene was a different matter altogether.
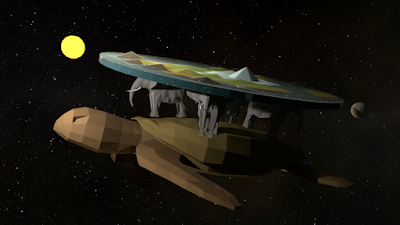
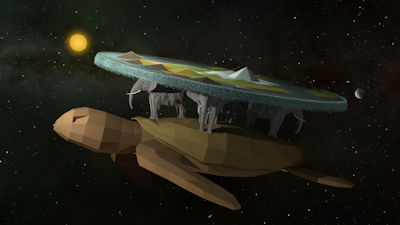
After a few fruitless attempts, I decided to do it in post-processing. To speed things up a little. Because that works every time. Twenty nodes later and with no idea of what I just did, I had something that resembled a shining sun. The problem is that I'm not sure if it even fits the scene. Maybe with low poly you shouldn't use blur and glare. Or post-processing in general. I don't know. You can compare my first render (with no effects or particles) and the final one. Which one do you think is better?
And with that tantalizing question set loose, it's time to wrap up. As I mentioned at the beginning, I'd like to continue with the Discworld series and create several places from the books. Environments, not characters, thank you very much. I haven't decided which one I'll make first but I reckon it will be something from the first two novels.



Comments
Post a Comment