The Octopush
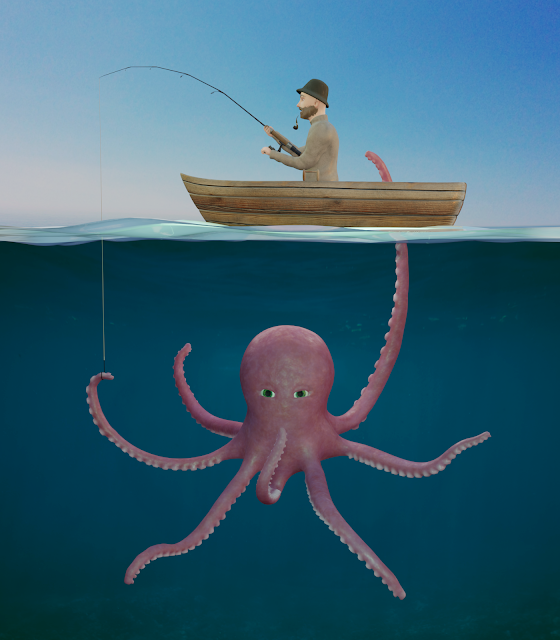
The good news is that I managed to finish the render on time. But, as it's become suspiciously too common now, I can't say I'm very pleased with it. It definitely looked better in my mind. I wonder if I've raised my personal achievement bar too high, or if I started to make worse scenes. Well, no use complaining about it now, let's have a look.
No-one would guess how much work went into it. Take the fisherman, for example. I had to sculpt the head and the body, retopologize it, UV unwrap it, export it to Substance Painter, texture it there, export it back to Blender and create the shaders. Then I had to rig and position the arms and hands and set up the particle systems for eyebrows, moustache and beard. Is any of that detail visible? No. I don't know why I bother with roughness variation when you can barely see the base colour of the materials once they return to Blender. I have no idea why so much information seems to get lost, but it's driving me crazy.
Huf, huf. That's one rant down, one more to go. Do you remember how I...er, disliked rigging the tentacles? Yes? Do you know what's worse than tentacles? Hands! Gosh, does that poor guy have a serious case of malformed fingers. I can't imagine how he does the fishing with hands like that. The left one is slightly better but I can't recommend you zooming on the right one.
(You have, haven't you? Well, I did warn you.)
I don't want to go into too much detail this time, so I'll just add a quick note about the background. I don't know how you make underwater scenes. I dug up a tutorial that promised to teach me that, but I ran out of time before I could watch it. Long story short—I improvised. I found free images for the water and sky sections. Then I added a simple fractal-displaced plane for the water surface. I made a test render—and it looked horrible.
I looked at some underwater references and I noticed that things seemed more... blurry when submerged. That's probably because of the light refraction thingy, but physics was never my strong suit, so I tried to fake it. In Krita, at first. And it went really poorly. If anything, it gave you the idea that you should get stronger glasses. So I returned to Blender and added a solidified plane between the camera and the octopus. I had to play a lot with the transmission because Eevee has a different way of dealing with sea see-through materials. (Oh, I should have probably mentioned that I was rendering it in 2.8. So, yeah. I was.) In the material tab, there is a new "Options" section that lets you set the Blend Mode. By default, it is set to Opaque and even if you crank up the transmission to 1, you won't get a glassy material. I had to set it to the Multiple mode and keep the colour very white for it to give me the desired effect.
And then it was just the normal routine of trying a myriad of different HDRs, additional lights and colour schemes. You don't need me to go over that again, you probably get the idea. One more annoying thing I'll mention here, though, is that in the current 2.8 build, whenever I reopened the file and switched to Eevee's rendering mode, I was welcomed by shining white materials. I had to manually click on each one, and toggle "Use Nodes" off and on again, before the textures kicked in. Not the worst thing in the world, but it doesn't help when you are under a deadline.
Next week I don't—actually, this time I have an idea in mind already. I want to focus on improving areas I'm not very good at. Couple of weeks ago I mentioned that I rarely hand-paint in SP. So, I'd like to model a couple of simple objects and dress them in some nice, stylised textures. And then, it's back to class, this time focused on lighting. But let's not get ahead of ourselves, and take it one week at a time. Have a good one!


Comments
Post a Comment