Pokemon 03: Lapras
And the winner of this week's competition is: Lapras! I really liked the cute little fella in the show so I can't simply pass the chance of sculpting him. But I do hope that I won't end up making a mess of it. That would be a shame.
Before I get to the creative bit, though, I have a few organizational things to sort out. First, in the past two months I have outgrown the boundaries of this blog and I have expanded to other platforms as well. You can find my profiles in the handy links section on the left. Second, I have added a Subscription Links gadget, so in theory you should be able to subscribe to the blog via RSS feed. I say "in theory" because Blogspot's gadgets are finicky at best and they often work in mysterious ways. So if anyone actually attempts to use this and it doesn't work, please do let me know in the comments.
With that out of the way let's finally get to creating Lapras. As I write this I already have a base mesh, and I'm preparing to jump on it with my assortment of sculpting brushes.
After the last week's experience with retopology, I'm planning to be smarter this time. One, I'm starting the project on Monday hoping that my Sunday will be less stressful than the last one. Two, I'm not going to spend too much time on sculpting. I'll just do what I have to in order to get decent model to snap to and I'll finalize the mesh during retopology. And since my plans are generally known to work marvelously I can't wait to see what will go sideways this time.
***
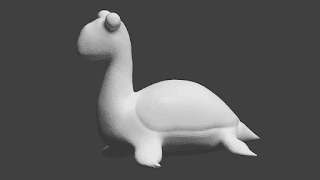
Right, two days into this project and I have a basic detail-free sculpture. I made my life easier by applying SubSurf modifier to the base mesh so that I didn't have to manually smooth out the whole body. With the basic sculpture, I made Lapras a bit rounder and I outlined the shell. I have also added two blobs on his head which will eventually become its ears. At least I hope so because—looking at the artwork—it's not going to be easy getting the shape right.
***
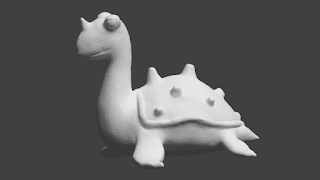
Oh, how I love my little predictions. Guess what? The ears were anything but easy to sculpt and, truth be told, I don't think I've made a very good job of it. It's the bloody "two-sides-nothing-fits" deal again. Approaching it first from the side view, I carved the spiral motif. Then I rotated the model to front view and it was hilariously horrible. And so I chipped the material here and there and it messed up the side view. Multiply by twenty and you get the idea of how my afternoon went. Eventually I molded them into a shape I'm least ashamed of but it still looks like Mrs. Lapras is going to bed with hair-curlers on.
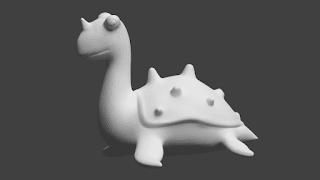
Anyway. The other details weren't too difficult to make. I had to rework the shell knobs a few times because I weren't happy with their position (and the available artworks are not particularly consistent in where they put them). The horn I made relatively fast and I secretly hope it looks decent. Maybe a smidge too small but I can always say that I intended to create a baby Lapras. Problem solved.
***
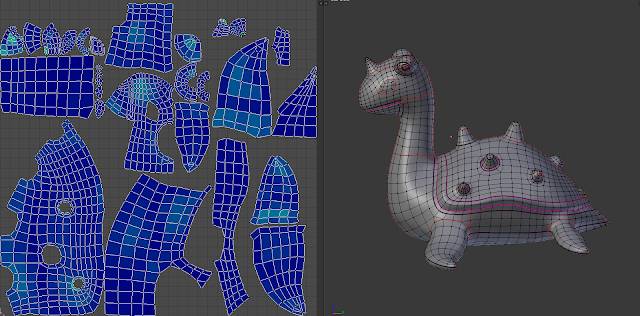
The last section was written on Wednesday. It is now Saturday and I have successfully finished the retopology part of this project. It was significantly less painful than the last one but it still took considerable time and effort. As I worked on this during the course of several days I don't have an exact time frame for how long it took but I'm guessing some 10 hours. Which is a great success because this body is much larger than Charmander's.
I also think that I managed to create cleaner topology than last time. I kept repeating the mantra "surround your details with edge loops" and it did help tremendously. The second rule I tried to follow was to create edge loops where I thought more geometry might be needed later (for tightening the creases for example). I can't be sure that the choices I made are correct but at least I succeeded in actually putting the edge loops where I wanted them. Unlike last time when they came alive and went around the model in unpredictable ways.
Before I started, I was dreading two parts of the mesh in particular. The ears, because of the sculpting experience, and the shell knobs. The ears turned to be pain, the knobs did not. I was lucky enough to find a reliable way of doing them by the time I finished working on the first one so they actually ended up being the simplest part of the mesh.
And now? It's the texture-painting time, baby.
***
Ring ding-ding! Texture-painting time over. Return to your corners!
Eh. What is it that makes me slightly unhinged by the end of each project? No, don't answer it, that was totally rhetorical.
On a more serious note, the texture painting was fun. I even went as far as using my brand-new tablet. Then it became significantly less fun. Well, depends on where you were standing. If you were a fly on the wall you were probably pissing yourself laughing. When I first plugged in the wretched thing, in one majestic swoop I managed to resize my Blender window, switch to the browser and open the developer console. If at that moment "Help meee..." appeared in the console, I would have seriously considered believing in ghosts.
Well, that didn't happen so I limited myself to feeble protests in the style of "Wha-?" and "Where did it-?" or "What the-?". But because I'm a particularly stubborn lady I forced myself to paint the eye with the tablet. It took a lot longer than it would have had I used the mouse but there you have it, my first tablet-created thing. Little more practice should make it usable. Some time in 2046.
No, I think I will get used to the pen eventually, but my main problem is that I can't figure out how to pan the view and zoom in. Which I do so naturally with the mouse that I don't have to think about it. With the pen I'm only able to rotate the view. There is one extra button on it but as far as I'm concerned it's purely decorative and was put there by an extremely sadistic manufacturer to make me poke it every five seconds to see if maybe it does something now. (It doesn't.)
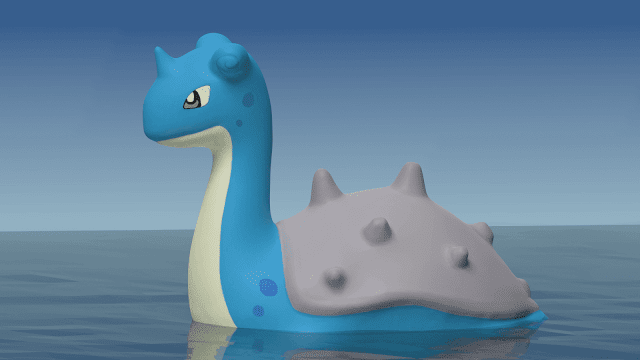
Regarding the details, I tried to venture into the more subtle art of shading because I thought the shell would benefit from it but I ended up caught in a loop which went something like this: "Too subtle — nothing has changed — still getting nothing — WHOOPS! — Too much! Way too much!" So, yeah. Not as nicely shaded as I would have liked but it's a start.
I also experimented with the shader a bit. Since I'm using Blender version 2.78.5, I have access to the Principled shader. I'm not sure if I've mentioned it here before but it is supposedly the King of all Shaders in the sense that most shaders are already IN IT. You get a bunch of options to play with and that's exactly what I did. I tried to make the skin look wet so I increased the Clearcoat value a bit. And then I pulled it back most of the way because with that option enabled things start to look varnish-y very quickly.
And then it was just the matter of stealing out of my previous projects once again and the environment was done in five minutes. After which I spent some two hours fiddling with minor details, preparing the gif and... I have another big announcement!From this week on, I will upload my models to Sketchfab as well. This will give you the opportunity to see it from all sides. Just beware that Sketchfab has its own way of displaying things and they don't necessarily agree with Blender. Hence why I spent ridiculous amount of time trying to make it look decent. For instance, the seams were showing in the texture (even though they were not doing that in Blender) and I had to dig deep into the scene setting in Sketchfab to make them disappear.
The reasons why I want to upload the models are that one, I spent a lot of time on Lapras's fins and you wouldn't be able to see them in the final render, two, you can download the model and give me a feedback on the topology and texture, and three, I can share the models with you and you can then use them in your own projects. I intentionally set up the license to be as open as possible which means that you can modify the model and use it commercially as long as you give me credit (a link to the source page should be sufficient).
So there you have it. I hope you will find Lapras as enjoyable as I do. Oh, and if you are wondering about the fate of Charmander and Bulbasaur, I'm planning to upload their models as well, although I will have to retopologize Bulbasaur first and I don't know when I'll be able to get to it. So keep an eye out and do let me know in comments if there is anything you want to ask or if you have any juicy bits of knowledge you'd like to share.




Comments
Post a Comment